Building a home calisthenics gym gives me a practical solution for staying fit without expensive memberships or bulky machines. I love having the freedom to work out on my own schedule, set up my environment how I want, and focus on bodyweight progress. Creating a home gym doesn’t need to break the bank, but it helps to know what gear, layout, and routines work best for both my space and my goals. Here’s my take on setting up a calisthenics gym at home, featuring clear steps, gear suggestions, and tips I’ve picked up along the way.
Why Set Up a Calisthenics Gym at Home?
Having a gym at home means I can skip the commute and dodge the crowds, all while tailoring my setup to fit my own preferences. Calisthenics relies on bodyweight moves like pushups, pullups, dips, and squats, so I don’t need a ton of room or any huge machines. Even a small corner of my living room or a little slice of the backyard can work perfectly well for most exercises.
I’ve found that calisthenics is awesome for building strength, improving flexibility, and boosting endurance. It’s beginner-friendly and rewarding for advanced athletes too—it focuses on real-world movement and functional strength. Watching my progress as I hit new personal bests feels pretty eye-catching, and I love how quickly I can switch things up as I get stronger.
Setting Up Your Space for Training
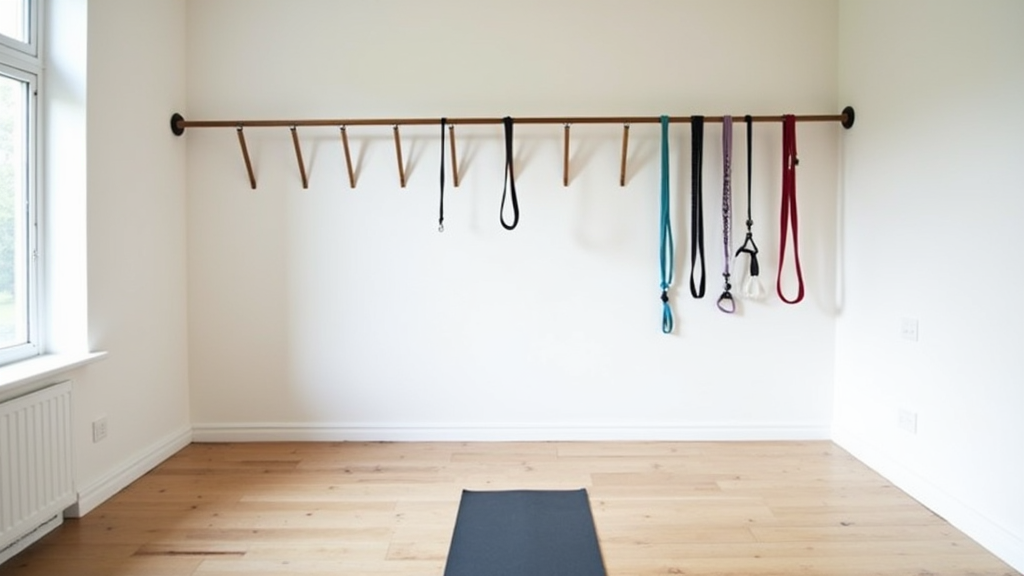
Before buying equipment, I look closely at the space I have. A calisthenics gym needs less real estate than most home gyms—just enough to lay down a yoga mat or towel. I clear a flat spot that’s free of clutter and lets me move around easily in any direction, making sure I can jump, lunge, and stretch without bumping into anything.
- Indoors: Spare rooms, garages, or even a living room corner can work. I like areas that get good light and have some ventilation to keep energy up.
- Outdoors: A patio, backyard, or solid piece of grass is great. If I pick an outdoor spot, I aim for level ground and, where possible, a little shelter from the weather for year-round use.
Wall space is key for mounting pullup bars, and overhead clearance is important for hanging or jumping exercises. For flooring, I stick with a rubber mat or thick yoga mat to cushion my joints and keep things safe and comfortable—especially since I often train barefoot or need to jump.
Essential Calisthenics Equipment for Home
Bodyweight workouts don’t need much—just a few solid pieces of gear that open up a lot of options. Here’s what I always recommend:
- Pullup Bar: My first purchase is always a reliable pullup bar, either door-mounted or wall-mounted (making sure it can handle my weight safely). It lets me train upper body and core with pullups, chinups, or just hanging exercises.
- Dip Bars or Parallel Bars: These are great for dips, leg raises, and moves like Lsits. Free standing dip bars or a pair of parallettes are compact and easy to store.
- Pushup Handles or Parallettes: They help take pressure off my wrists and let me go deeper during pushups, making classics like the pushup a lot more challenging. Parallettes also work for handstand progressions and Lsit holds.
- Resistance Bands: Bands are small, affordable, and super versatile. I use them for assisted pullups, adding resistance to pushups or squats, stretching, warming up, and more.
- Gymnastic Rings: If I want a challenge, rings are next-level cool—they add instability, work extra muscles, and can be set up indoors or outdoors using a pullup bar or tree branch.
- Mat or Soft Flooring: A non-slip mat protects my joints and makes any kind of floor exercise or stretching a lot more comfortable. It also keeps equipment steady on smooth floors.
As I progress, I sometimes add a weighted vest for extra difficulty or an ab wheel for extra core work. Advanced athletes might pick up a medicine ball or grip trainers as well. But it’s worth remembering no gear outpaces consistency and smart progression—it just gives me more ways to challenge myself.
Getting Started With Calisthenics Exercises
I base my workouts around key movement patterns to cover all my muscle groups and make my routine balanced. Some exercises I keep coming back to include:
- Push Movements: Standard pushups and all their variations for chest, triceps, and shoulders.
- Pull Movements: Pullups and chinups for the back and biceps. When I’m new, rows with rings or bands help me get strong enough for full pullups.
- Leg Exercises: Squats, lunges, and stepups for quads, hamstrings, and glutes. Once I get stronger, singleleg moves like pistol squats seriously step it up.
- Core Work: Think planks, leg raises, mountain climbers, and Lsit holds to keep my abs and stabilizer muscles working hard.
I build circuits with these exercises, shooting for high reps with good form, and rest for short periods between rounds. That keeps intensity up, builds endurance, and gives a real fullbody workout. As I get fitter, I try harder moves—like archer pushups or jump squats—to keep it interesting.
Key Things to Keep in Mind Before Jumping In
Planning ahead pays off. Here are a few details that help me make the most of my setup:
- Safety: I always make sure equipment is installed properly. Bars and rings need to be locked in securely and tested before weight goes on them to prevent mishaps.
- Progression: Calisthenics can be ramped up or scaled down. If a move is too tough, I use easier versions or assistance. As things get easier, I add reps or try out harder skills.
- Routine and Motivation: Sticking to regular training times—even 20 minutes, a few times a week—helps me make real progress. Tracking workouts in a notebook or fitness app keeps me accountable and fired up.
- Technique: Good form is everything. I watch tutorial videos, read super detailed guides, or connect with experienced calisthenics folks to spot and fix bad habits before they become issues.
Equipment Installation and Space Savers
I double-check my door frames, walls, or mounting spots before setting anything up. Manufacturer instructions work, but I also like looking at user reviews for tips and tricks. Freestanding equipment like dip bars and parallettes mean I don’t have to drill or permanently change the space—perfect for renters or shared living.
Making the Most Out of Limited Space
Living in a small apartment? No problem. Collapsible bars, resistance bands, and foldable mats are easy to tuck away under a bed or in a closet. Rings and bands are a breeze to hang up and store after each session, so my space doesn’t feel cluttered.
Intermediate and Advanced Tips for a Home Calisthenics Gym
Once I’m confident with the basics, I start mixing things up to keep improving. Here are some strategies I use:
Experiment With Tempo: Slowing things down, especially on the lowering phase of pullups or pushups, makes moves harder and builds strength faster. I add pauses at tough points for an extra boost.
Add Resistance: As bodyweight moves get easier, I fill a backpack with books or pick up a weighted vest. Using resistance bands makes even standard pushups or squats feel fresh and challenging.
Skill Training: Progressing to skill moves like handstands, muscleups, or front levers keeps me motivated and gives new goals to chase. I break these down into smaller steps and practice the little skills regularly.
Circuit and Superset Training: Doing exercises back to back without breaks fires up my heart and saves time. For example, a pushup set, followed by squats and then pullups, before resting—this kind of combo is both tough and effective.
Keep Your Routine Dynamic: Don’t be afraid to try something new—floorbased exercises, balance drills, or mobility work all keep things lively. Rotating exercises every few weeks prevents boredom and makes sure every muscle group gets worked fully.
Calisthenics Gear in Action: Real-World Usage
On a typical day, I rotate between base moves and skill work. My pullup bar gets a workout at each session—not just for pullups, but also for hanging abs and grip training. Resistance bands are great for warming up, mobility drills, and dialing down or amping up exercise difficulty as needed.
- Outdoor Workouts: A set of rings or bands and a mat turn my backyard or local park into an instant gym, and training outside keeps my sessions refreshed on nice days.
- Minimalist Options: When I travel or have a hectic schedule, a good mat and a couple of bands are enough for highquality workouts. Pushups, squats, planks, and mobility drills can go anywhere with me.
My home gym setup lets friends and family join in too—teaching a family member how to use rings or bands is a fun way to stay social while staying active. Over time, my simple setup has turned into a reliable and affordable way to keep moving at home.
Frequently Asked Questions
Question: Can I really get strong with only calisthenics at home?
Answer: Definitely. With consistent training, good form, and the right variety, bodyweight moves help me build strength and muscle just as well as weights.
Question: How much should I spend on equipment?
Answer: My basic setup cost me less than $100. If I stick with the essentials—a pullup bar, resistance bands, and a mat—I have everything I need. As I get advanced, picking up rings or a weight vest is a fun, affordable upgrade.
Question: What if I don’t have space for a pullup bar?
Answer: No worries! I can attach bands or rings to sturdy doors or outdoor branches. Parallette bars and floor moves are good options too for getting a full workout without any need for hanging moves.
Start Your Own Calisthenics Gym at Home
Setting up a calisthenics gym at home lets me call the shots on my fitness. With a bit of planning and a few key pieces of gear, I can work every major muscle group, challenge myself with new skills, and stay active yearround. Whether my goal is strength, mobility, or simply feeling healthier, having my own home gym gives me all the flexibility and motivation I need to keep going strong. Time to clear a space and set the stage—my DIY calisthenics gym is the start of a new adventure in fitness.