
If you’ve ever tried to do a pull-up and barely budged, you’re definitely not alone. Most people find pull-ups tough at first, especially without access to fancy gym equipment. But there’s good news. Calisthenics progressions pave the way to getting your first pull-up, and all you really need is your body and a sturdy bar or ledge. I’ve put together this step-by-step guide to help you train smart, avoid injuries, and enjoy those little wins along the way.
Why Progressions Matter When Training for Pull-ups
Mastering a pull-up doesn’t happen overnight because it requires pulling your entire body weight—no small feat! If you jump right in and try to muscle out a full pull-up, you could strain something or lose motivation after a few attempts. Progressions are a gradual way to build strength, technique, and confidence. By breaking the movement down and tackling each step, you create a smoother path toward hanging over that bar with your chin up, literally.
The basics of progression aren’t complicated: start with what you can do and keep adding a new challenge as your strength improves. This approach is used by gymnasts, climbers, and military trainees everywhere because it works. Plus, with calisthenics, there are plenty of creative options for training in your backyard, at a park, or even at home with a sturdy doorframe bar.
Step-by-Step Calisthenics Progressions to Nail Your First Pull-up
Here’s a logical order for working up to your first pull-up. No machines or complicated gear required. Consistency and patience pay off big time.
- Dead Hangs
Simply hang from a bar (palms facing away, arms shoulderwidth apart). This does wonders for grip strength, something people often overlook. Try to hold for 10-20 seconds, eventually working up to 30 seconds or longer. - Scapular Pulls
Hang from the bar and, keeping your arms straight, pull your shoulder blades down and together. Lower back to a relaxed hang, and repeat for 8-12 reps. This wakes up the tiny stabilizer muscles around your shoulders and preps you for the next stage. - Assisted Pull-ups (With Resistance Band or Self-Spotting)
Loop a sturdy resistance band around the bar and step one or both feet into it, or have your toes on the ground (if you’ve got a low bar) to push off just enough. The goal is to train the movement pattern with less than your full weight. Start with 3 sets of 4-6 reps and increase as you get stronger. - Negative Pull-ups
Jump or step up so your chin is over the bar, then slowly lower yourself down as slowly as possible. This eccentric movement builds the exact muscles needed for pulling up, especially your lats, forearms, and biceps. Aim for 5 slow negatives per set (about 3-5 seconds each). - Australian Rows (Bodyweight Rows)
Find a low bar or sturdy horizontal surface. Lie under it, grab with an overhand grip, and pull your chest towards the bar. This works your back and arms in a similar range of motion as a pull-up but with your feet on the ground for help. Try 8-12 reps per set, aiming for 3 sets or as many rows as you can do with good form. - Partial Pull-ups
Start by pulling yourself up just a couple inches, then lower down. Gradually increase your range of motion every week as you build strength. Celebrate those extra few inches; they really add up! - Full Pull-up Attempt
After a few weeks of the above, you’ll likely surprise yourself. Give a full pull-up a shot and see how it feels. Even getting halfway up is progress. Cycle back through these progressions and keep adding volume and difficulty as needed.
Pro Tips for Training Pull-ups Without Any Gym Equipment
Training at home or outside means making the most of what you’ve got. Here’s what helped me along the way, and a few more ideas for good measure:
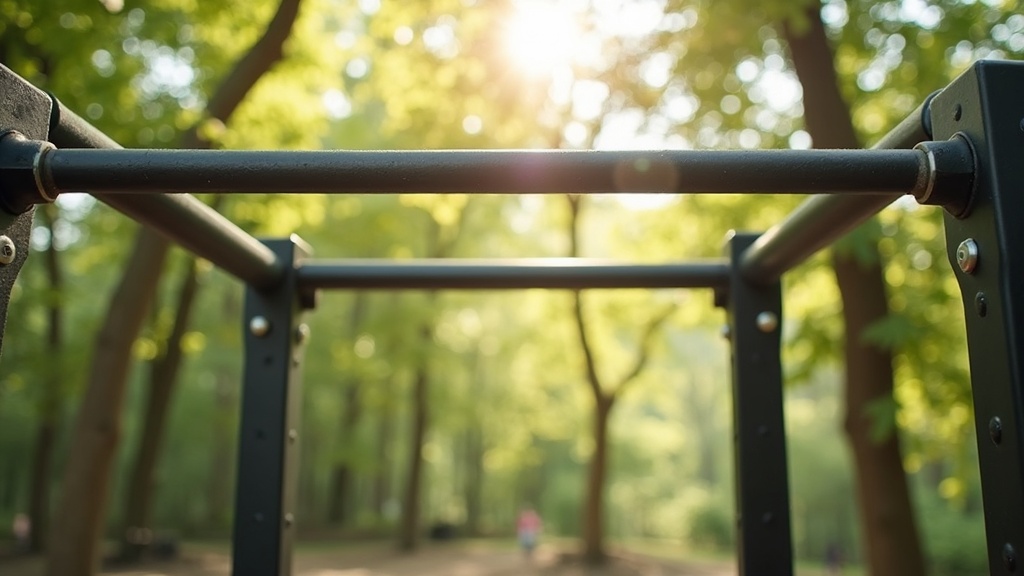
- Find a Good Bar: Any solid horizontal bar works; a playground pull-up bar, a sturdy tree branch, or an overhang in a park. Just check it can support your weight and isn’t damaged.
- Track Your Progress: Write down the reps and sets you do. Seeing improvements over time, even tiny ones, keeps you motivated.
- Rest Your Hands: Pull-up bars can be rough on your skin. If your hands get sore or torn, take a day off and use your downtime for stretching.
- Focus On Form: Quality over quantity always wins. Engaging your shoulder blades first prevents you from pulling with just your arms and helps avoid injury.
- Stay Consistent: Building strength takes time. Stick to a schedule, even if you can only manage a few minutes each session, and your body will adapt in ways you never imagined!
- Don’t Neglect Flexibility: Stretching your shoulders, wrists, and back regularly will make each pull-up session feel smoother and can cut down on injury risk.
Common Problems and How to Tackle Them
Trying for that first pull-up brings its own unique set of hurdles. Knowing what to expect makes it easier to deal with the tough days.
- Grip Strength Limiting You: If you’re slipping early, spend more time dead hanging or squeeze a tennis ball during the day to build up those forearms and fingers.
- Shoulder or Elbow Discomfort: Sharp pain is always a reason to stop. Sometimes added mobility work for your shoulders or a longer warm-up with dynamic moves (arm circles, band pullaparts) really helps.
- No Bar at Home? Use a doorframe pull-up bar (the kind that wedges securely up top), or search for sturdy outdoor structures. Even heavyduty playground equipment usually works.
- Lack of Motivation: Schedule your workouts and set realistic, weekly goals. Training with a buddy or sharing your progress also makes a big difference.
Dead Hangs
The dead hang is often overlooked, but it sets the base for everything else. Just grab the bar, let your body relax, and hang. Your grip, shoulders, and even core get an active workout. The longer you hang, the more natural the pull-up position will feel, and your body will adapt to supporting itself; super useful if you’re just starting out or even if you’ve hit a plateau. If you struggle at first, remember even five seconds is a win. Build from there.
Assisted Variations
Bands are by far my favorite tool here. They reduce your load but let you practice the real technique of a true pull-up. If you have no bands, using a chair under your feet to slightly “cheat” is totally fine during the learning stage. Willpower and patience pay off more than equipment. Also, switching up your grip (overhand, underhand, mixed) can target your muscles differently and provide new progress.
Australian Rows
This move is sometimes called an inverted row. You can set up a broomstick across two chairs, use a park bench, or look for a railing at a safe height outdoors. It’s a pulling motion that’s often missed, but it helps a ton in building horizontal pulling strength, which matters for vertical pulls like a pull-up. No equipment? Try a study table edge if it’s safe enough, just to get those pulling reps in.
Negatives
Negative pull-ups really build confidence. You build confidence by practicing just the lowering phase, strengthening the same muscles used for going up but with less risk. Slowing down the movement also develops control and muscle awareness. You’ll feel the difference in grip, back, and shoulders within just a couple weeks of adding negatives to your routine. If you want an added challenge, pause halfway and hold for a couple seconds.
Beginner Friendly Pulling Exercises to Mix In
It’s a good idea to include other simple pulling moves in your routine to get ready quicker and curb boredom. Here are a few to keep things fresh and build wellrounded upper body strength:
- Towel Rows: Throw a strong towel over a door, hold each end, and lean back as you pull yourself up towards the door (keep the door closed!). This move works your muscles and challenges your grip big time.
- Superman Holds: Lay face down, arms out, then lift your chest and arms off the ground, holding for a few seconds. These build up the rear shoulders and upper back without any equipment. Start with 5-10 second holds for a few reps.
- Doorway Rows: Stand facing an open door, grip the sides at shoulder height, lean back, and pull your chest toward the door. Focus on squeezing your shoulder blades at the top, and always watch your footing for safety.
- Backpack Pulls: Fill a backpack with some weight (books, water bottles) and grip the straps with each hand. Bend over slightly and row the bag up towards your chest. This mimics the rowing motion and is perfect if you’re away from any type of bar.
Frequently Asked Questions
Here are some of the most common questions from folks starting their pull-up adventure from scratch:
Question: What if I can’t do any pull-ups at all yet?
Answer: Start with the progressions—dead hangs, Australian rows, and negatives are perfect. Most people take a few weeks or even months to get their first rep. Patience and consistency pay off.
Question: Can I get strong enough for pull-ups without a gym membership?
Answer: Absolutely. Plenty of people hit their first pull-up with calisthenics alone, using playgrounds, parks, or budget pull-up bars for the doorway. It’s about sticking to your plan and finding creative ways to get your sets done.
Question: How often should I train pull-ups?
Answer: Training 2-4 times a week is usually great for beginners. Take a rest day in between for your muscles to recover and get stronger.
Question: How long does it really take to get the first pull-up?
Answer: It varies for everyone, but most beginners can get a solid pull-up anywhere from 4 to 12 weeks with regular progressions. Genetics, previous training, and consistency all play a part. Stick with it and enjoy the little steps forward.
Pull-up Progression in Everyday Life
Building toward a pull-up means more than just getting stronger arms. You’re building grip, posture, shoulder stability, and upper body coordination. These upgrades carry over into real-life activities like hauling groceries, climbing, or helping a friend move furniture. Your confidence gets a solid boost, too, every time you check in and realize you’re getting closer to that first full rep. And let’s be honest, it feels pretty next-level cool to pull yourself up over a bar for the first time.
Whether you’re totally new or picking up where you left off, calisthenics progressions are straightforward and satisfying. Take your time, enjoy the adventure, and remember, every session pulls you one step closer to that first pull-up. Keep at it and appreciate every milestone—even the smallest wins push you farther than you think!